By Nic Lindh on Sunday, 10 September 2017
Addendum: Six months later, I posted a follow-up post that’s more reflective than technical
I love podcasting. Podcasts have almost completely replaced radio for me. It’s amazing how much excellent content is out there, free for the download.
It’s awesome that no matter what niche thing you’re interested in, somebody else out there is way, way more into it than you are and is making a podcast about it.
And now I have two podcasts, my own Swedish-language podcast, Amerikapodden, which is tiny, but I very much enjoy creating it, and an English-language podcast, Smell the Foam Finger, where my co-host explains American sports to me.
I’m a web developer and a technologist, so starting a podcast should have been right in my wheelhouse, but it was way harder than I thought, with more things to think about and more things to purchase than expected.
Of course the Internet has many, many guides to podcasting and an avalanche of forums where people discuss podcasting, but for a novice it’s difficult to parse the information and separate the lunatics from the knowledgeable.
Most of the guides on how to podcast are written by successful podcasters who have been doing it for a long time. It’s great and appreciated they share what they know, although it often seems they may have forgotten or repressed a lot of the things that were challenging when they first started out.
Which is why I’m writing this getting started guide before I get comfortable and start to forget.
This comes from the perspective of somebody who is good with technology but had little experience with audio production. However, the guide doesn’t make any assumptions the reader is good with technology.
Like any other difficult task, the best way to conquer it is to break it down into smaller, achievable tasks.
Many people have done it. You can do it, too. And you don’t have to be a nerd to do it.
Before we get into the nitty-gritty, a warning: Don’t get bogged down in gear. So, so much of podcast discussion devolves into nerds yelling about microphones. Mics are important, sure, but they’re way, way less important than the Internet would have you believe.
Think about the shows you like. How many times have you thought, man, I wish they were using a different mic? Do you know what mics they’re using? Do you care?
So don’t let picking a mic give you an anxiety attack.
As a matter of fact, don’t let any of the myriad decisions you have to make paralyze you—if you don’t know what choice to make, just make one and move on. You can course correct later as you have more information.
Let’s dig in. Grab a cup of coffee and make yourself comfortable.
The content is what matters. The words you put into your listeners’ earholes. Those are what really matter.
What you do to think up those words, to record those words, and to get those words to your listeners’ earholes does not matter to your listeners at all.
Your listeners want to be entertained or provoked or soothed or informed, or whatever your podcast provides for them. That’s what matters to them, so that should be what matters to you.
Which takes us to the first point: You are going to suck.
At first, you will suck. Podcasting is not a natural act. Unless you’re a standup comedian or already have experience as on-air talent, you will suck.
Fortunately, if you care and work at it, you will suck less, and then you will suck less, and then over time you will become good.
Making a podcast is hard work, with the emphasis on work.
I don’t say this to be discouraging in any way. I say this to soften the blow when you listen to your first effort.
If you don’t believe me, listen to Ira Glass of This American Life, one of the best in his field, talk about storytelling. The part I’m referencing is in the third part of the series, but I recommend watching through from the beginning.
As Glass says much more eloquently, you suck at first because you know what you want to achieve but you don’t have the skills to achieve it yet. You can only get the skills through practice.
Nobody just picked up a guitar and played Stairwell to Heaven perfectly.
In the second part of the video, Glass also gets into how everything wants to be crap. Which it does. Any creative endeavor you embark on wants to be crap.
This is super important to understand. Especially for your sanity.
Podcasts obviously live on the Internet so they need an Internet home.
I always recommend people purchase their own domain for anything they do on the Internet. This is a long topic, but to condense it down, if you own a domain you can put your content in many different places and move your content around as you see fit without your audience noticing. You never want to have to tell people to resubscribe because you moved things around.
Your podcast should have a home on the Internet. It can be a Tumblr site, a WordPress site, a SquareSpace site or whatever. Doesn’t matter. What matters is that you can map a domain to it so your content and your Google juice are transferable.
Google juice is the most important currency on the Internet, so you must make it yours. Own your domain. If you don’t, you’re working to help somebody else increase their Google juice. This is called sharecropping and is not a good thing. Own your domain.
A .com domain usually costs around $12 per year, but you don’t have to get a .com. Whatever weird domain extension you like is fine. .coms are the gold standard, but don’t worry too much about it.
Though I have many, many reservations about Facebook, the easiest thing you can do is to simply create a Facebook page.
Obviously you can’t host your podcast there, but you can use it as your online presence, though I strongly recommend against it being your only online presence. The reasons for that is a long rant and I’ll elide it for the purposes of this post.
Here’s what I recommend: Purchase a domain and set up a simple site for your podcast. At the very least, it’s a place to point people and for Google to find you.
You’ll need a place to upload your mp3s so your audience can download them. (Yes, they should be mp3s. It’s the lowest common denominator. Your file format is not where you want to go bleeding-edge.)
This can be any kind of web host. Just a place where podcast players can find your files.
However, if you want download stats—and you probably do, so you can know how many people are listening—you need a “real” podcast host.
There are a couple of usual suspects: Libsyn and Blubrry are the major players, and Fireside is a new contender that looks nice.
Personally, I host my own files and use Podtrac for the analytics. If you’re a web nerd you can download and use a Jekyll podcast template I created.
Libsyn is the 800-pound gorilla in the space and they know what they’re doing. A lot of the podcasts you already listen to are probably on Libsyn.
Don’t try to jerry-rig your own analytics and hosting unless you really know what you’re doing.
How good the audio quality of your show has to be depends on you and your audience. Some people create hyper-produced shows with NPR quality and some yell into their phones and post that.
It’s your call.
Your audience might be very forgiving of audio quality or they might disregard anything that sounds less than “professional.” It depends.
That being said, the better you can make your podcast sound, the better off you are. Different people have different thresholds for what sound quality or lack thereof they’re willing to tolerate.
Fortunately, it’s not very expensive these days to create audio that sounds decent.
This means you’re going to have to spend some money. You can spend literally any amount of money to make your podcast sound better—the audiophile sky is the limit—but you don’t have to spend a lot.
(It’s kind of funny how in audio there really isn’t an upper ceiling on what you can spend, either to produce it or consume it.)
But you don’t have to spend a lot to get to a minimum threshold where people stop paying attention to the audio quality and start paying attention to the content. Which is where you want to be. You don’t want listeners to turn off your podcast because they can’t hear what you are saying.
Your audience simply shouldn’t think about how your podcast sounds. It’s all about the content.
When it comes to which equipment you need, Dan Benjamin has made his living running a podcast network for many years, and he has put together a battle-tested list of podcast equipment. Dan knows what he’s talking about. Listen to him.
It’s up to you how much money you want to invest. The more you spend, the better the quality, but only you know your budget and your aspirations.
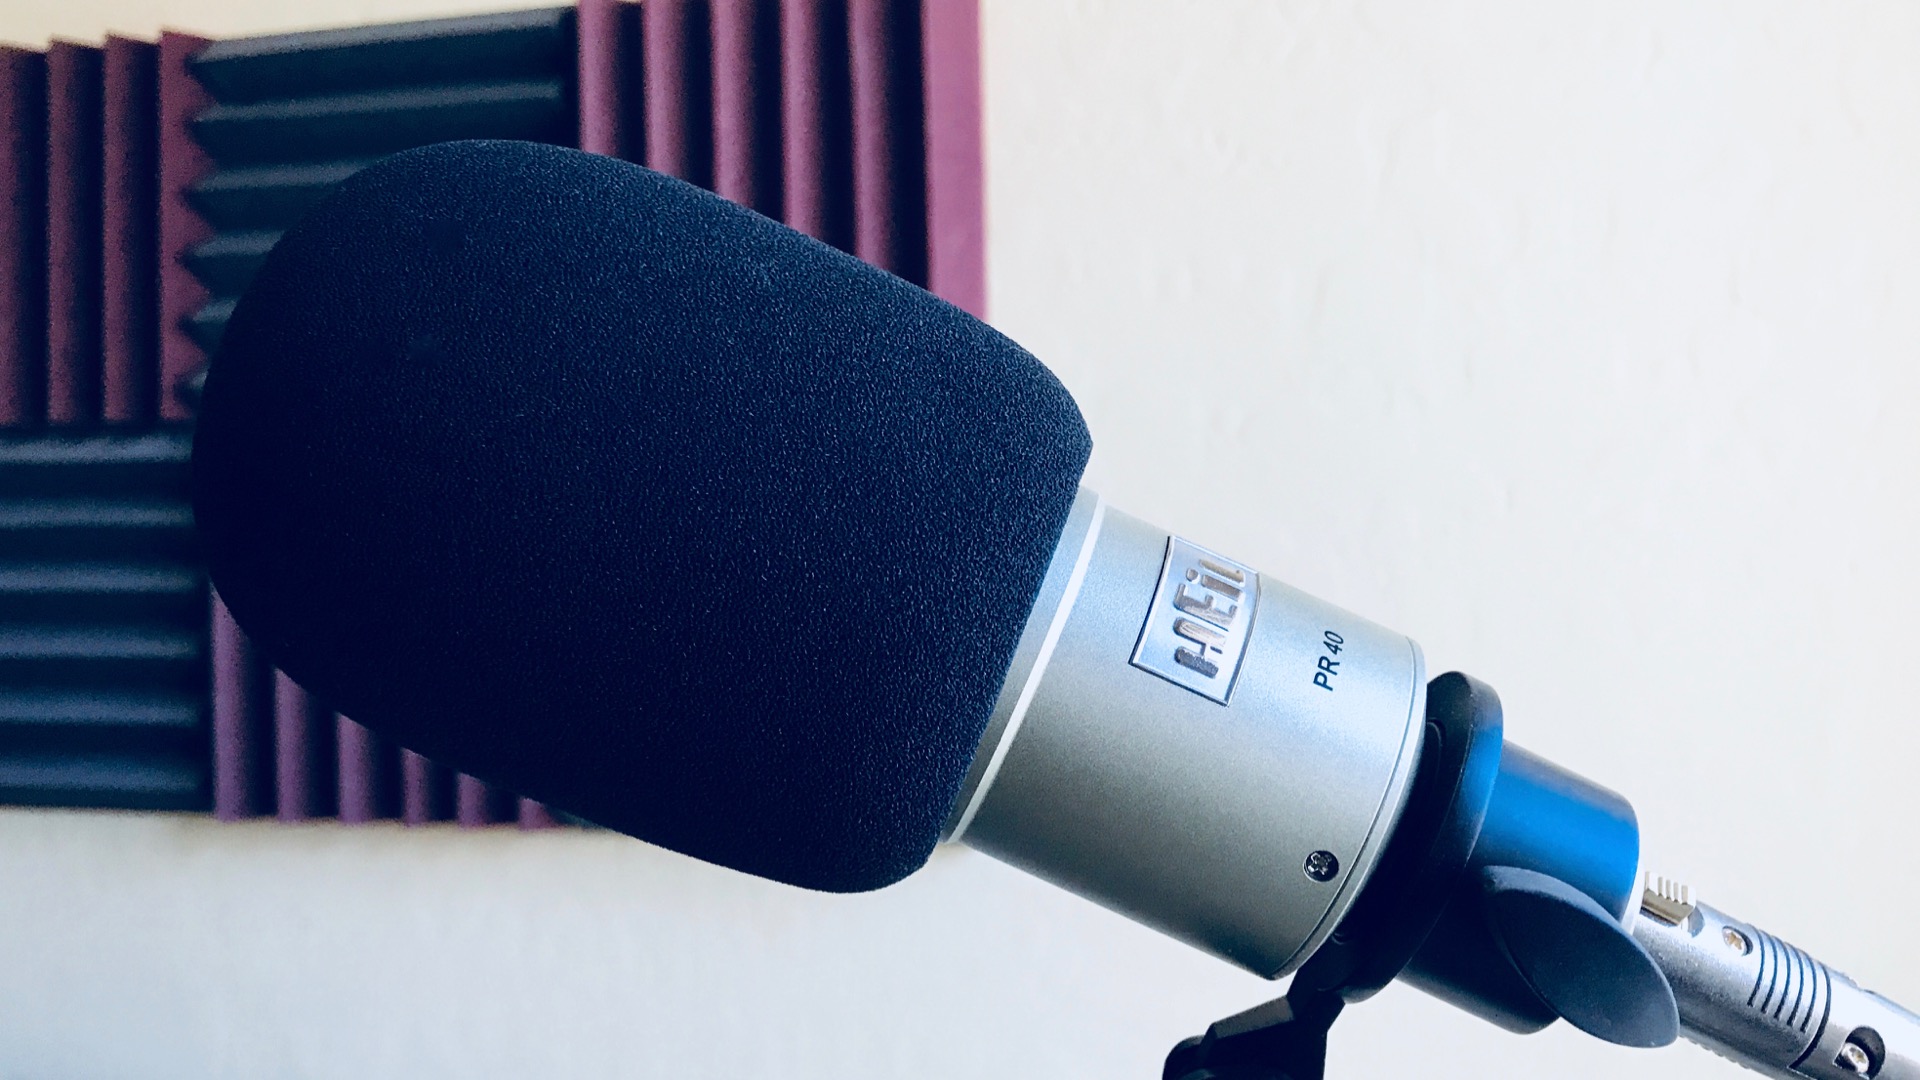
I’m currently using a Heil PR-40 that feeds into a Zoom H5 recorder.
For Smell the Foam Finger, my co-host is using a Shure Beta 58A. I really want to get him on the PR-40 as well, but I’m apparently not made of money.
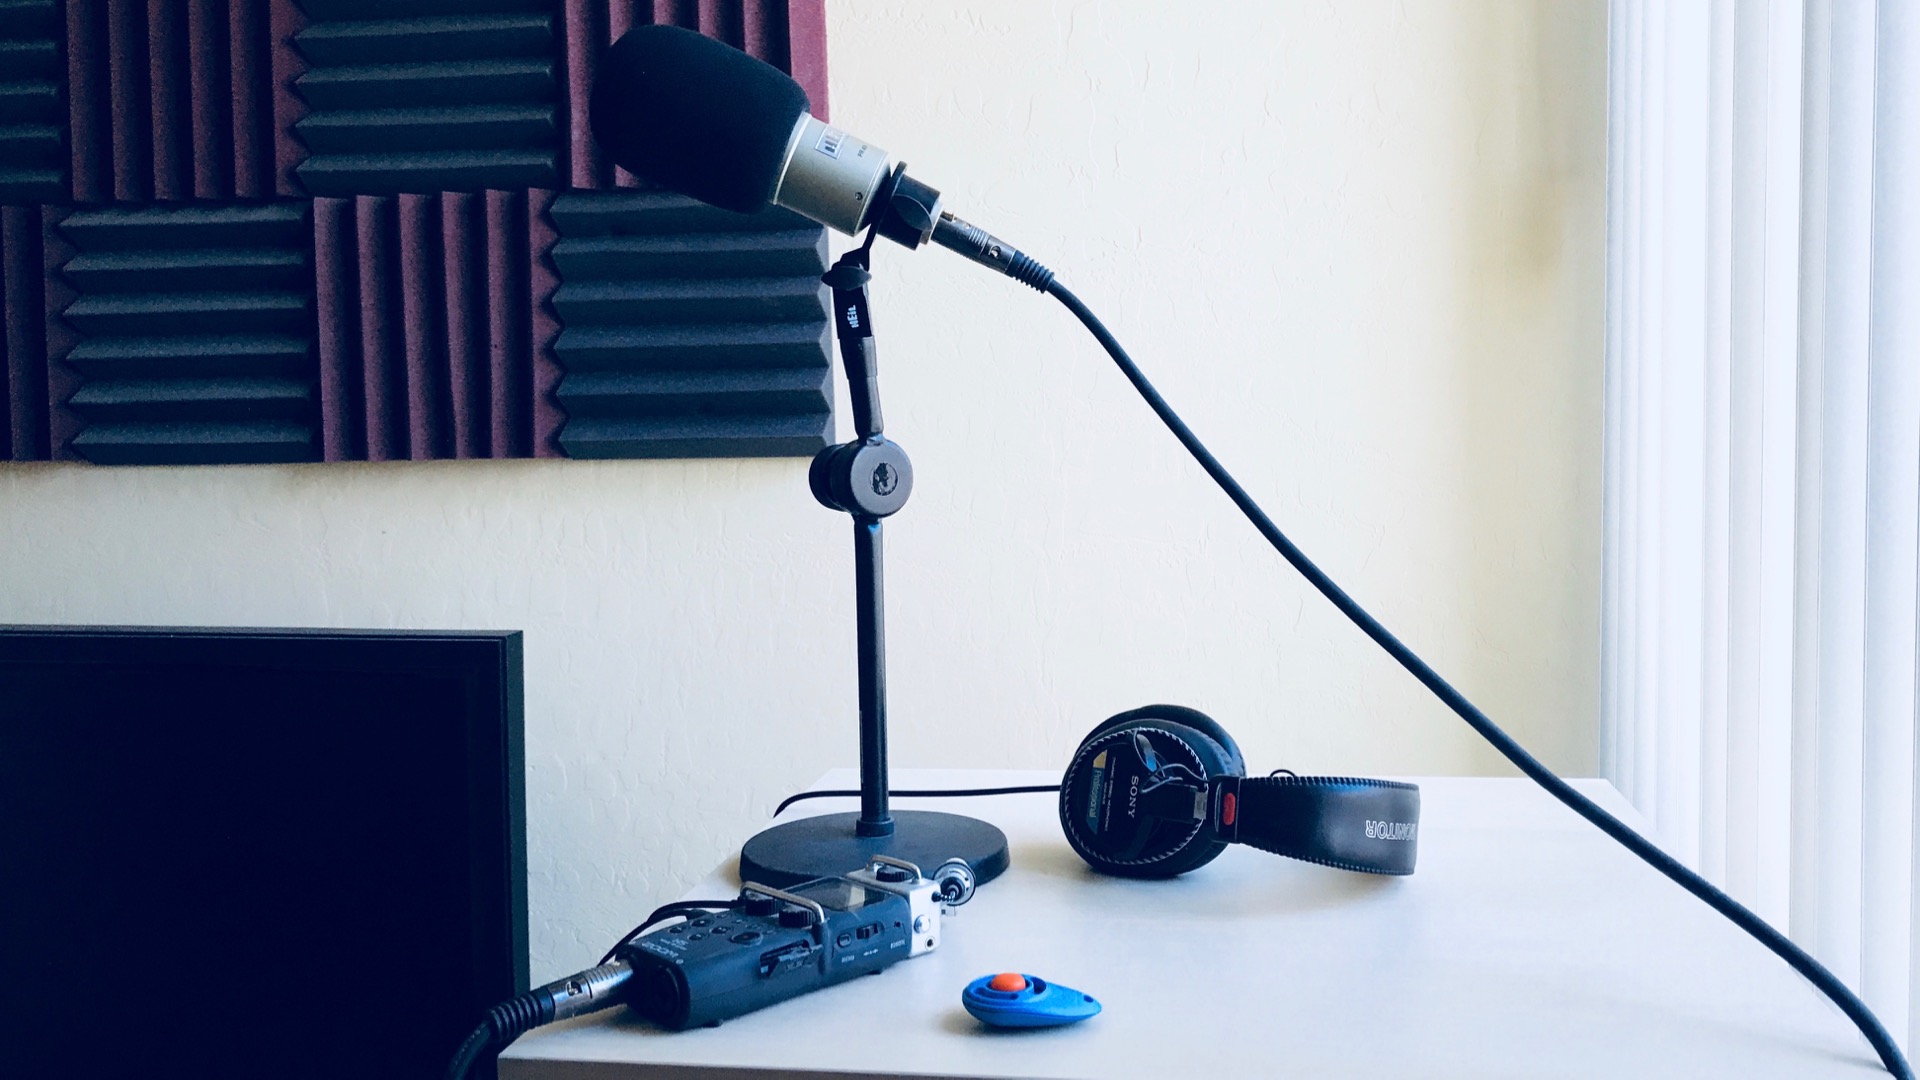
Heil PR-40, Zoom H5, Sony MDR7506 with replacement pads, and a clicker.
Heil PR-40, Zoom H5, Sony MDR7506 with replacement pads, and a clicker.
The Zoom H5 is working well for me and I really like not having my computer involved in the recording. The magic is that the Zoom only does audio recording—it literally only has one job—so there are fewer opportunities for gremlins to sneak in. Less complexity means fewer problems.
No matter what gear you buy, where you record matters more.
The number one enemy of high-quality audio recording is room noise. If you go buy the top-of-the-line stuff Dan Benjamin recommends and you record in a concrete bunker, you will sound terrible. Full stop.
Your terrible recording can probably be improved by an audio engineer with very expensive software, but unless you have one of those on hand, you’re SOL. And you really, really don’t want to get yourself into the soul crushing business of salvaging bad audio.
So record clean. With audio, you need the cleanest inputs you can get. Which means recording in a sound-dampening environment. If you can build a studio, that’s great. Most people can’t.
Personally, I record in what I think of as my monk cell, which is the tiny room where I watch TV and write blog posts. I put some acoustic dampeners on the wall, and they have helped my quality tremendously.
(As an aside, if you want to watch movies loud in your man cave, acoustic dampeners will help with the audio quality for your TV in a major way. You know, if you need another reason to make the investment. Echo is bad, unless you’re a cathedral.)
But if you’re just getting started or you don’t have the money to spend to sound treat a room, you have two great options: A car or a closet.
Car interiors dampen sound a ton. Record in a parked car and it will sound great.
A walk-in closet full of clothes also dampens sound a lot, so just go stand in a closet and record and you will sound like you’re in a fully-treated studio.
I recorded my first podcasts in a walk-in closet with a Blue Yeti, a mic that’s notorious for picking up room noise, and it sounded great.
Cars and closets are your friends.
A last-ditch solution if you don’t have access to any kind of dampening space is to record under a heavy blanket. You will feel like an idiot and you will get sweaty, but you will sound good.
The rest is experimentation. Record and listen. Hang more blankets on the wall, record and listen. Move the mic to a different location, record and listen.
Only you know what you and your audience consider good enough.
No matter what equipment you have and where you record, if your technique is bad it will still sound bad.
Remember when I said this is work? We’re close to the inside of the onion now, but this layer is tricky because this layer is all you.
When I first started I spent a lot of time searching the Internet for tips on recording technique, and it was mostly fruitless. But recording technique is super important.
Be as close to the mic as you can. Seriously. You should be closer than you think you should. You should feel the mike as you record. Closer is better. No further than a hands-width distance from the mic.
If you’re really close, you can turn down the gain, which means you will pick up less room noise and your audio is cleaner.
Being close to the mic also means you’ll blow your plosives. Plosives are “p” sounds. They cause a sound wave that makes your mic go nuts and emit a really ugly sound. Plosives are bad.
The obvious and yet very difficult solution is to be at the exact correct distance from the mic where it picks up your voice perfectly but without popping or distorting. That, my friend, is Morpheus-level difficulty.

Image still from “The Matrix.” Credit: Warner Bros. Entertainment Inc.
Image still from “The Matrix.” Credit: Warner Bros. Entertainment Inc.
To get rid of the pops you need a filter. It can be a pop filter or a windscreen, which one doesn’t matter, only that it works.
You’re the only one who can find out what works for you.
How do you find out? Record! Listen to yourself.
Get closer to the mic.
When you’re recording, wear headphones. If nothing else, use the ear buds that came with your phone to monitor yourself.
Even if, like me, you’re only recording yourself talking, wear headphones. You must know what the mic is picking up.
In a controlled environment like a studio, you’ll know what’s going on, but there will still be surprises. Did the recorder conk out? Did you just find a new angle that makes the mike pop? Are the gardeners outside suddenly loud enough the leaf blowers bleed through?
Whatever it is, you want to know about it while you’re recording, not while you’re editing.
Wear headphones.
It’s the cheapest and easiest insurance policy you can get. If you’re recording and you’re not wearing headphones you’re inviting disaster. Seriously, one day you will kick yourself. Headphones are the easiest and cheapest way to avoid disaster.
Use whatever headphones or earbuds you have, though I recommend the Sony MDR7506 headphones—they’ve been a studio standard forever, they’re built like tanks, they’re comfortable, they’re not all that expensive, and you can use them to listen to tunes when you’re not recording.
If you watch making-of videos of songs, you’ll probably see your favorite performers wearing the Sony MDR7506 headphones in the studio.
Some people can just step up to a mic and lay down a perfect recording.
Those people have sold their souls to Satan.
You won’t be able to do that. So you need to edit your show.
Editing your own voice is painful. You will hate how you sound. How you hear yourself when you’re talking and how others hear you is very different. When listening to a recording of yourself you hear yourself as others hear you. You are not used to this. You will find it painful.
This is normal.
Audio editing is a skillset unto itself and audio editing software goes from free to quite expensive.
The Wirecutter has a nice roundup of recommendations for podcast editing software. Professional voice actor Mike DelGaudio—who runs the Booth Junkie YouTube channel and has a voice to kill for—really likes Reaper.
Right now, I’m personally using Ferrite on my iPad to edit, which I like for its focus on spoken audio.
As a sidenote, DelGaudio has a great tip about using a clicker when recording to make editing out bad takes a lot faster and easier.
But in the end whatever software that fits your budget and your personal software taste will work.
How heavily you want to edit of course depends on your goals. However, in order to respect your listeners’ time, you definitely need to go in and take out false starts and long pauses. And mouth sounds. Yech, mouth sounds!
Remember, your listener is giving you their time. Even if you put it out there for free, your listener is still paying with time. Respect that.
Of course, it’s possible to spend limitless time editing. It truly is a rat hole you can disappear into forever.
But the other side of the coin is that it’s in the editing you can really make your podcast shine.
As a sidenote, I’m old enough that I remember editing by literally cutting reel to reel tape and let me tell you whippersnappers that editing in software is so much faster and easier it’s almost ludicrous.
As you’ve no doubt noted, these are several different skill sets involved in podcasting: writing, performing, editing, and web producing are very different skills and you will find that you’re better at some than others. This is normal.
Whew. This post became much longer than I was expecting. Thanks for reading it and I hope it was useful.
Now go out there and record something cool for me to listen to!
Note: Updated on May 12, 2018 to add link to the second post about podcasting, a link to Smell the Foam Finger and general style edits.
Affiliate links: Some links are Amazon affiliate links. If you purchase through them I get a tiny kickback from Amazon. It doesn’t cost you anything extra and is appreciated.
Let’s talk about how fun it is to have a go-cart people mover.
Is there reason to upgrade from a 3 to a 5?
The Internet tells Nic to install Ubiquiti gear in his house, so he does, and now he has thoughts.
What I wish I’d known when I started podcasting.
Nic reports his experiences so far with voice computing from Amazon and Google and is a bit mystified at the reaction to Apple’s HomePod.
After a few weeks of using iPhone X I’m ready to join the congratulatory choir.
Nic is interested in smart homes. His contractor let him know how the wealthy are already using them.
Apple’s neglect of the pro market is causing a lot of gnashing of teeth in Apple-nerd circles, but it’s true to Apple’s vision.
There is unrest in the Mac community about Apple’s commitment to the platform. Some are turning their eyes to building a Hackintosh to get the kind of computer Apple doesn’t provide. Here’s what it’s like to run a Hackintosh.
Car nerds are dealing with some cognitive dissonance as car technology changes.
The Oasis is Amazon’s best e-ink reader to date, but it’s not good enough for the price.
Nic buys an Amazon Echo and is indubitably happy with the fantasy star ship in his head.
The problem isn’t ads. The problem is being stalked like an animal across the internet.
The DS416j is a nice NAS for light home use. Just don’t expect raw power.
The Core Dump is moving to GitHub Pages. This is a good thing, most likely.
Thoughts on Apple Watch after half a year of daily usage.
Predictably, the Paris attacks brought the anti-encryption crowd back out of the woodwork. They're at best being willfully disingenuous.
Things to consider when planning to build a site on a compressed time table.
Nic provides some basic not-too-paranoid tips for securing your digital life.
Installing Jekyll on an EC2 Amazon Linux AMI is easy. Here are the steps.
After wearing the watch for over a month, Nic has thoughts on its future. Spoiler: Depends on how you define success.
Turns out “it's just a big iPhone” is a stroke of genius.
Some technical terms still confuse people who should know better, like journalists.
How to host a static site on Amazon S3 with an apex domain without using Amazon’s Route 53.
People fear change, so new technology is used as as a faster version of the old. This makes technologists sad.
Nic provides a lesson plan for teaching total beginners HTML, CSS and JavaScript.
Nic loves his Pebble and looks forward to the Apple Watch, but realizes he’s in the minority.
Nic loves books, but he loves their content more.
Nic is worried about the fragile state of our technology and thinks you should be as well.
Nic tries to understand the WATCH. It doesn’t go well.
Nic thinks home integration could be Apple’s next major category. Read on to find out why.
Nic is frustrated with his Kindle and would love to see Apple make an e-ink reader.
Nic delves into the shady computer enthusiast underworld of the Hackintosh.
On the Mac’s 30th anniversary, Nic reminisces about his first.
The iPhone was announced Jan. 9, 2007. It now occupies a huge chunk of Nic’s life.
Nic is very impressed with the speed of the iPhone 5S and iPad Air.
Nic tells you how to find a theme for your new site.
Nic buys a Nexus 7 to test the Android waters.
All Nic wants for WWDC is sync that actually works
Nic is ecstatic about the backlighting on the Kindle Paperlight, but Amazon has made some strange design decisions and there’s a display hardware flaw.
Nic makes a new ebook and is dismayed by the sad state of ebook publishing.
One of the equivalences of haircut and clothing on the Internet is your email address.
Nic outlines some of the risks of ceding comments on news stories to Facebook.
Nic is bemused by the sturm und drang surrounding the iOS-ification of Mac OS X.
Web publishing used to require heavy-duty nerditry, but no longer.
Nic is creating an e-book. He shares what he’s learned so far.
Nic really digs e-book readers. No, seriously, he really digs them. And you should, too.
The future and now of personal computing is appliances. This post parses why you shouldn’t worry about it.